Tuesday, November 3, 2015

Autumn = Soup.

I love soup in the Fall. It's a cup of cozy. A bowl of bountiful flavours. This one is going to become a staple in my recipe box! As always I found the original recipe online but modified it enough to make it my own. I hope you try it and love it, too -- Please comment below! 

Roasted Carrot Turmeric Soup

Ingredients:
1 and 1/4 cup red lentils
6 carrots, peeled and cut into slices 
1 EACH medium white potato and yellow bell pepper, chopped 
5 cloves garlic, peeled 
1/2 can coconut milk
1 and 1/2 cups water 
olive oil 
1 tblspn herbs de Provence 
1 tspn EACH -- turmeric, cumin, paprika, dill weed and mustard seeds 
Salt & Pepper
 
OPTIONAL TOPPINGS:
Sliced mushrooms
1/4 cup salted pumpkin seeds 


This sounds fancy but I promise you are doing all the steps at the same time and poof! It's ready in no time at all. 

To start, if you've read any of my previous posts you know I adore Bulk Barn. That place is the only way to go for spices and grains (amongst other things like candy and salty snacks. Just walk away from those aisles. Walk away.) 

Ahem. Only $5 for the spices, seeds, lentils AND coco milk. Total! 


Aw, the lentil bag is smiling! Lucky lentils. Now let's use them, shall we? 

Turn your oven to 180 (355F) and line a large baking sheet with foil. Evenly spread out the carrots, potato, bell pepper and three of the garlic cloves. Drizzle olive oil over them and then sprinkle with herb de Provence and the S&P. Pop it into the oven when it's preheated and roast for about 25 minutes, or until all are nice and tender (you should be able to easily slice a carrot with the side of a fork.)


Time to multitask! Don't fret, you're prepared! While the veggies are roasting get out your frying pan, a small pot and the blender. Boil about half a pot of water and when rolling boil is reached, throw your lentils in and boil uncovered for ten minutes. Turn to low and simmer an additional ten mins, covered. Don't forget to give them a wee rinse beforehand! 

They're such a pretty color...


Drain them when they're ready and then plop into the blender with the 1 1/2 cups of fresh water. 

Just before the veg are ready to come from the oven get the remaining seasonings rockin' in the fry pan (turmeric, paprika, dill, cumin, mustard seed.) Add about 1 1/2 tbspns of olive oil and stir all together to get that gorgeous flavour blending together. Do this until the mustard seeds start pop-popping! 

It's a spice painting! 

*at this point your neighbors are going to come sniffing around because sweet geebus this kitchen is creating some heavenly stuff. 

Pull the baking tray out and place the cooked veggies into the blender with the lentils. Add the coconut milk and your heated spices. Then blend up until creamy-smooth...this will depend on how nice your equipment is! Mine is standard Canadian Tire-available equipment and it was about 3 minutes on low. 

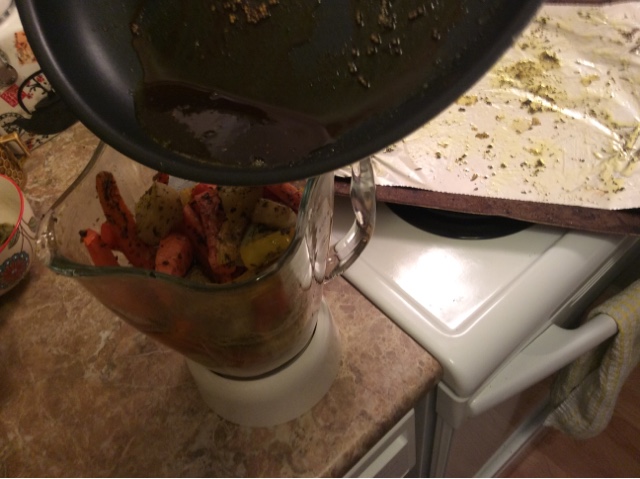
Ignore the messy background. That's just the sheet the carrots Etc came off of. I clean up after. And note, this is important: Turmeric sneaks onto clothes and counters and does a wicked good job of leaving permanent stains. Wipe up fast and don't wear your favourite shirt while using it. 

Final step, if desired....sauté your mushrooms, remaining garlic (mince it up first) and pumpkin seeds in the same frying pan you did the spices in. The 'shrooms (heh) will happily suck up any remaining bits in there. 


Now! Scoop some warmed up soup into your favourite bowl and top with the mushroom mixture. This? Is an Autumn meal. It made approximately 4 portions (about 1 1/4 cups each.) 

Let's post the first photo once more because it's awesome enough to see it twice. 

Happy cooking! Xo Stace 


Sunday, December 14, 2014

Everybody likes meatballs!

Ten months later I'm back online. 

Life has been busy and really, I just kept forgetting to take photos as I cooked this past while. But today! I remembered. I am heading to another holiday gathering tonight and if you've read some of my previous posts, I'm all about using my crockpot whenever I can. It's fast and easy, and let's me get anything else I need to do done while it does the work. (Like today, for example, was very busy with napping and reading my book.) 


So here's another recipe to make and bring as an appetizer for any party you may be attending, or you could serve it over rice and veggies as an entree. And only FIVE ingredients required. Say what?! Yeah. Five.

*Apologies for the photo-taking above. I blame hunger for the fuzzy shot but at least you get the gist. 

1) Box of frozen meatballs, approximately 60 pieces 
2) Two Tablespoons of Dijon mustard 
3) One can of jellied cranberry sauce 
4) Three tablespoons of low-sodium soy sauce 
5) 3/4 bottle of BBQ sauce (the one in the photo is my favorite!) 

If I've got the time and patience, I would make my own meatballs as an alternative recipe for the protein too, but in a pinch the premade ones from the grocery frozen section is very handy. Turkey meatballs would be good with this sauce, too. 

Now get how ridick-simple this is....don't thaw out the meatballs; just place them in the crockpot as-is. Next: Take the remaining four ingredients in a bowl and combine them until there's a smooth consistency. No jelly lumps, please. 

*Digression: Has anyone seen that old cartoon called "The Family Dog"? If so, you'll remember the scene where they feed him, and the food comes out of the can, still can-shaped. Heh. That's cranberry sauce,too. https://www.youtube.com/watch?v=tGbXqbhDZyM  

Now cover the meatballs with the sauce, then gently stir them to ensure all are evenly covered with it. Cover, set the temp to low, cook 4 hours. 

Voila! 
The salt of the soy cuts the sweetness of the cranberry, and the BBQ and mustard brings just enough savoury zing to it, too. Your party-people will be so impressed with your culinary bringings. Enjoy and remember to share. 'Tis the season!

Get cookin',
Stace 

Sunday, February 23, 2014

Stew: winter's not over yet.

I love soups, stews, and sometimes even chili. This recipe is sort of a combo of all three. I hope you give it a try as it is hearty and wonderfully simple to whip up on a weekend, or set it up after work one night, then turn it on the next morn and let the crock pot do it while you're at the office. Come home to dinner ready to roll. 

Mmm...roll...rolls...dinner rolls would be good to dunk in this but sadly I try to keep my house bread-free. So you should carb out and tell me how awesome it was. 

Ok let's get this show on the road. Here's what you need to make the chicken and bean stew:

-1 pound uncooked skinless boneless chicken breasts *I used cutlets as they cook fast and evenly.
-1/2 teaspoon each salt and pepper 
-1 red pepper
-1 onion
-1 can no-salt-added kernel corn
-1 tablespoon dried oregano 
-2 teaspoons cumin
-1/4 teaspoon pepper flakes
-4 cloves garlic, minced 
-1 teaspoon taco seasoning (I make my own...the other stuff has silicone! Ick!) 
-2 cans white kidney beans
-1 Tetra Pak sodium reduced chicken broth.
**The wine in the background is optional to drink during. It always keeps this cook happy!**

Start layering your ingredients....chicken on the bottom, with salt n pepper.
Then add the veg (diced pepper, diced onion, and your drained can of corn). Top with spices. 
Open the two cans of beans and give a rinse. Shake-shake to get rid of most of the water, then plop that over the other pot ingredients. NO STIRRING! You want to layer. Add the broth last, lid it, and cook on high for 4-6 hours or low for 6-8 hours. 
I cooked on high as I was home on a Sunday to do it faster. I scooped out the chicken breasts at 4.5 hours, shredded them, then put them back in. Next was a quick teaspoon taste test of the broth n' beans; a touch more coarse salt was needed. Stirred it all up and switched it to low for another 45 mins.
That worked out great! It's got a hint of mexi flavour. The chicken is bountiful with just those two cutlets. I measured out 1.5 cup portions into containers and have lunch for most of the week... A definite recipe to repeat.
Happy cooking!,
Stace

Monday, December 9, 2013

Na-na-na-na-na-na-na-na...Batma...banana bread!

One of life's little comforts is a strong cup of coffee or tea with a thick slice of banana bread. I envy my Mum's bread that she makes and so I figured it was high time for me to give it a go...with my own twist. 

I wanted to try out something other Pinners had made note of -- using yogurt in the recipe. *Did I mention I have never tried to make any kind of bread before? Wish me luck.* So at 7pm on a Monday night I figured, what the hell? Let's give this a shot. 

Start out by preheating your oven to 350 and lining/greasing a loaf pan. In usual Stace fashion I like to do both, so I used parchment then greased that. Cleaning up is a breeze. If you don't like the paper being all sticky-out-y, just trim it closer to the pan edge after your batter is in. 

 Now, ingredients!
~ 2 seriously overripened bananas (mine were in the freezer first. I took them out to thaw for about an hour +, then peeled and mashed 'em.) 
~ 1/2 cup vanilla yogurt *I used the lactose-free variety. 
~ 1 tsp. baking soda 
~ 1/4 cup sunflower oil 
~ 3/4 cup brown sugar 
~ 1 egg, beaten 
~ 2 tsp vanilla extract 
~ 1 & 1/2 cups flour 
~ 1 tsp cinnamon 
~ 1 tsp baking powder 
~ 1/4 tsp salt 

Get out three small/medium/large mixing bowls. 

Bowl 1: Combine the banana, yogurt and baking soda in the small bowl. 

Bowl 2: Sift together the flour, cinnamon, baking powder and salt in the medium bowl. 

Bowl 3: This is your biggest and main mixer-upper. Gently blend together your oil and brown sugar, slowly adding in your egg and then the vanilla. 

Using your mixer on low (or your own raw strength if you're so inclined, tough guy,) add 1/3 of the banana mix to the sugar bowl, then 1/3 of the flour mix, alternating until bowl one and two are empty and all ingredients are JUST moistened. **Don't overwhip this sucker or your bread will be a bit tough. Well, so they say online. I have no flippin' clue because remember, I've never done this before either! 

Now pour that brown gooey goodness into your lined pan.  Bake for about 40-50 minutes. 

As with all baking, it can take a turn for the worst in a matter of minutes so watch that thing for any sign of possible burning! I stuck a fork in mine at 45 minutes and it came out wet so I let it go for about another 8-9 and then it was happy-happy to come out and be eaten. 

Let it sit in the pan for about ten minutes, then transfer to your plate for cutting. A piece while still warm, with melting butter? Why yes, don't mind if I do. 

Final result/opinion: This turned out great. It was moist, dense, and had lovely flavor. I will definitely make it again and may try it with three bananas next time...because I'm cray-cray like that. Get baking, Stace.

Tuesday, October 29, 2013

Quick n' Dirty.

....though I really recommend you wash them first. What?! 

I'm talking about big, beautiful russet (baker) potatoes. I always leave the skins on mine for extra vitamins, but feel free to peel them if you're so inclined. My title refers to the fact that I can only provide the recipe and one measly photo! I made this yesterday, but failed to take pics of the progress.

Crud! Sorry about that. Alas, this was some of the best soup I've ever made and so will definitely make it again.

I made a post on Facebook that I was cooking up a gongshow amount of bacon, in prep for this recipe. I got emails, comments, and conversations at the office today asking me how it turned out. Um....AWESOME, that's how. Wait, did I say that already? Right. Yes. BEST soup. Let's even throw a "HOT damn!" in there. 

So now it's your turn. Do you own a crockpot? Then make this. Like, tomorrow night. 

INGREDIENTS: 
- 4 Large baking potatoes. Cut 'em in 1/2" cubes 
- 1 white onion, chopped
- 1 900ml container of chicken broth 
- 3 cloves garlic, minced
- 1/4 cup unsalted butter 
- 2 1/2 teaspoons salt 
- 1 tspn black pepper
- 1 teaspoon dried dill weed  
 ----- < ---- this is me separating the ingredients for you, so it's easier to follow. Because I care. 

- 1 cup half n' half cream 
- 1/2 package of bacon, cooked in 'da oven (if you need help on this one, leave a comment and I'll fill you in!) Cut up into wee pieces. Not bacon-bit small, but about 1/2" or so each. 
- 1 cup diced green onions 
- Shredded cheese, as desired 

OK. Turn your crockpot on low and put the first eight ingredients in there to simmer for 8 hours. In a hurry? Put it on high for 4 hours instead. 

After time has passed, do a gentle mash (I like mine a bit lumpy.) Add the cream, bacon, and green onions and stir. Put the crock on simmer (if you have that setting) or just on low until you are ready to eat. Add shredded cheese to each bowl when served. 

C'mon! This screams "I am a satisfying bowl of Canadian Fall/Winter dinner!" Right? Right. 

Get cooking, 
 Stace.

Sunday, October 27, 2013

Oat-rn't you glad I made these?

That title is ridiculous. But now you know what the main ingredient is in this one and you can either say "Ew! Oats! No thanks," and stop reading now. Or, you can say "Stace! Tell me more!" Which I shall now do. Read on, fellow oat lovers.

I wanted an alternative to cold cereal, eggs or toast for breakfast; something I could make quickly in the evening that would feed me for a few days. This is also a super snack for work, or just sitting at home with a cup of tea...and it has just 5 base ingredients. Bring on the peanut butter oat bars! 

You need: 
~ 4 cups of rolled oats 
~ 2 tablespoons of chia seeds 
~ 1/2 cup of slivered almonds 
~ 1/2 cup honey 
~ 1 cup peanut butter, melted

Then add in whatever you fancy: Dried fruits, chocolate chips, different seeds or nuts, ground flax...the options are endless! I used Craisins, and I wanted to add some chocolate too but was surprised to discover that my baking cupboard was bare. Doesn't everyone have chocolate chips, like, always on hand?! Apparently not. Dammit. So I halved and threw in a few chocolate-covered espresso beans, because I'm crazy like that. Not many, so they will only turn up in a few of the bars once cut. (those suckers are expensive!) *Note: I got the majority of my ingredients, including the sweet beans, at Bulk Barn. That store should give me discounts for the amount I plug the place. 

Combine the oats, seeds, and nuts in a large bowl. 

Pour in your honey and mix well, then add in the melted peanut butter and mix again. You might need to get into this with your hands to make sure it is all combined. 
Quick tip: BEFORE you get your hands in the sticky mess, fill your sink with a few inches of warm soapy water so you can dip in that after without coating your taps, counter, and anything else in the general vicinity with goo. 

Press the mix into a greased 9x13" pan. I lined mine with parchment paper and then used cooking spray on that. Overduing it? Mmmmaybe. But I'm a bit paranoid when it comes to my baking sticking, resulting in it falling apart or me throwing the dish out in anger because it's impossible to get clean. And then I'm sad. And sad is not how one should feel while playing in the kitchen. 

Pop it into a preheated 350 degree oven for 25 minutes. Say hello again to Lil' Red. 

 I zig-zag-drizzled a bit more honey over it after I took it from the oven. Let cool for a bit on the counter, then pop it in the fridge to harden before cutting. 

Give them a-go and let me know what you did to yours! 

 Get baking, 
 Stace. 
 Source:

Wednesday, October 2, 2013

Canape? Can-a-please.

Definition: The canape is an appetizer consisting usually of a thin slice of bread or toast spread with caviar or cheese or other savory food. 

Well, the tasty vessel used in this one was a chewy apricot, no bread or toasty bits of carbo-goodness. I was off to a housewarming party and I wanted to make something non-sticky, non-plate-requiring, yay-for-working-with-wine-and-other-liquors. Result? Turkish apricots topped with goat cheese goodness. 

Sweet Mother. These? Were awesome. There's a wee chance I ate 2 or 6 of these before we headed to the party.

Here's what I used: 

 ~ A sackful (no idea of the actual count) of turkish apricots. I found them at Bulk Barn. If you have this store, go. Go now. Go for the apricots and other fabulous ingredients. Such as.... 

~ Almonds! Dry roasted, no salt. *You're gonna season them yourself. Later. 
~ A lovely brick of goat cheese. 
~ Green onions.
~ Half n' half coffee cream. 
~ Seasonings. 

Step one: Put that gorgeous cheese in a bowl. Here's the brand I found at Save-On Foods: 

Two: Add a smidge of the cream; just enough to make the cheese a bit more...pliable? Spreadable? Yes. 
 
Three: Flavor your almonds. I put about a teaspoon of olive oil in a pan, heated 'er up, then added the almonds. Toss these constantly for about 4-5 minutes, until they are browned. Well, browner than the sad brown they were when you bought them. 

Drain them on a paper towel. Pat-pat-pat them down to get most of the oil off, then put in another bowl and toss with the seasonings of your choice while they're still warm. 

I used sea salt and some fresh cracked pepper. I figured I'd keep it simple and let the other ingredients speak for themselves. 

I then finely cut some green onion bits. We are now ready to layer! Apricot -- wee chunk of cheese -- onion slivers in a crissy-crossy pattern -- and the big finale, your roasted almond. 

This is my go-to plate of goodies for future potlucks/wine nights/housewarmings/birthdays...and maybe just when I feel like making wee treats for my own damn self. 

Get cooking/baking/treatin', 
Stace.

Source: http://reluctantentertainer.com/2011/06/day-13-keeping-fruits-nuts-and-cheeses-on-hand-for-apricot-and-goat-cheese-bites-recipe/